Install and configure the TLS certificates
Note: If
you are not using a self-signed certificate (generated by the device), but instead
using a certificate signed by a Certificate Authority (CA), you must import the CA
certificate into DRS.
After installing DRS , complete the following steps. -
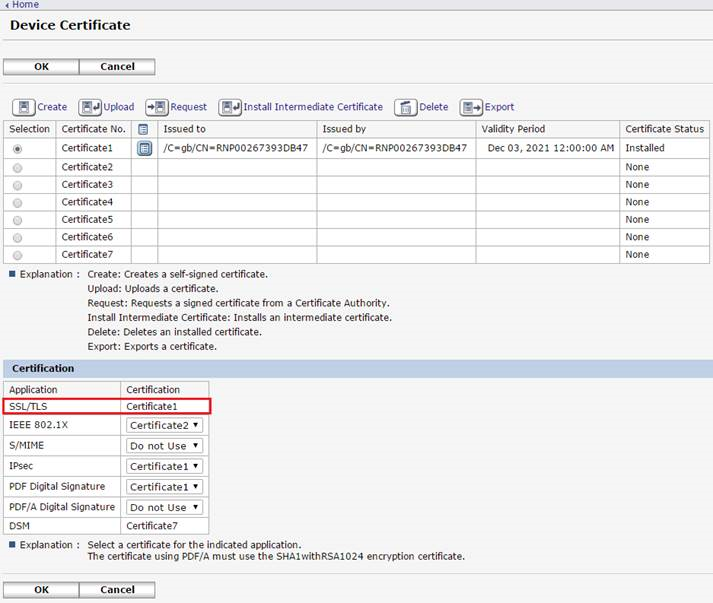
Verify that the device certificate is installed and the TLS certificate is
specified.
-
If the SSL/TLS certificate is not selected,
select it.
-
If the SSL/TLS certificate is not selected,
select it.
-
Verify that the Ciphertext Priority option is selected.
-
In the Permit SSL/TLS Communication field,
select Ciphertext Priority.
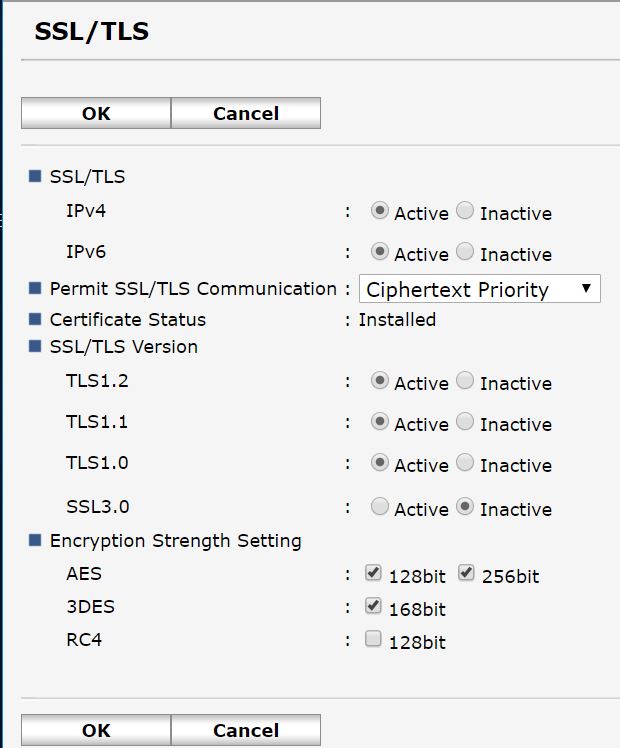 Note: If you are not using a self-signed certificate (generated by the device), but instead using a certificate signed by a Certificate Authority (CA), you must import the CA certificate into the appropriate Trusted Root CA store of the system where DRS is installed.Note: To use Ricoh configuration tools, you must select at least one of the following options: TLS1.0, TLS1.1, or TLS1.2 (support for SSL 3.0 has been discontinued). Support for the newer cryptographic protocols such as TLS 1.1 and 1.2 are provided to Windows through the Security Support Provider Interface (SSPI) API. To enable TLS versions, use Registry Editor. Once the registry changes are made, you may need to restart your server.Note: You can also configure these settings using the operation panel under Extended Feature Settings by selecting available functions. This operation panel is only displayed on the MFP device after logging in with administrator credentials.
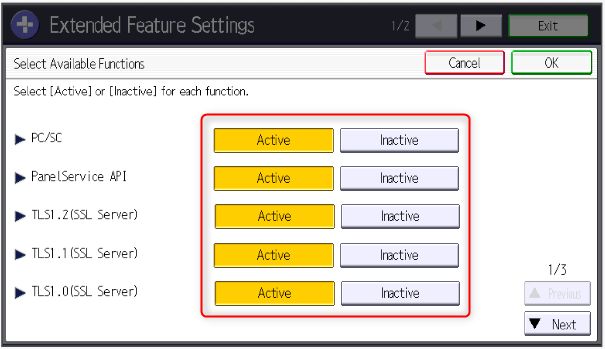
-
In the Permit SSL/TLS Communication field,
select Ciphertext Priority.