Configure the PrimeLink series
-
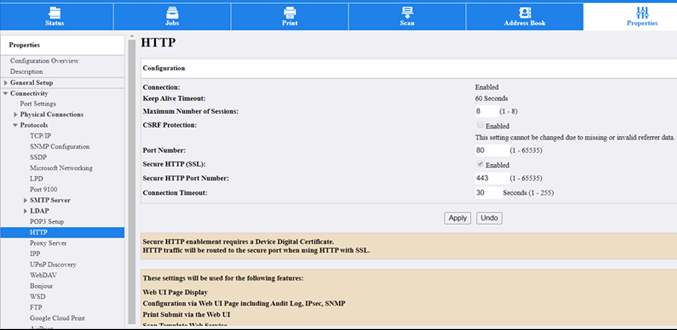
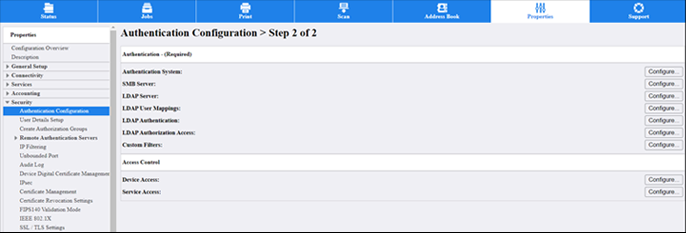
In the left pane, under Properties, click and ensure that Secure HTTP (SSL) is
selected.
-
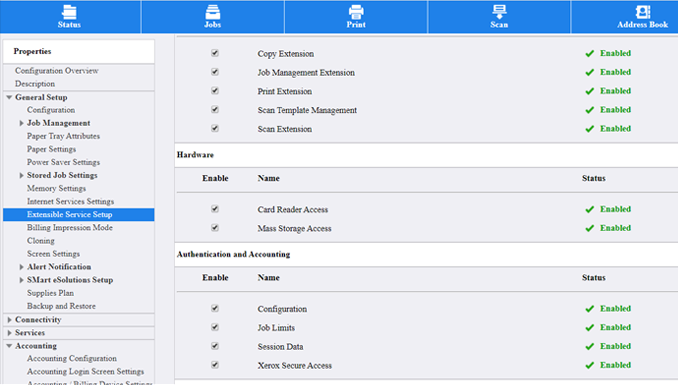
Click , and ensure that Xerox Secure Access is
Enabled.
-
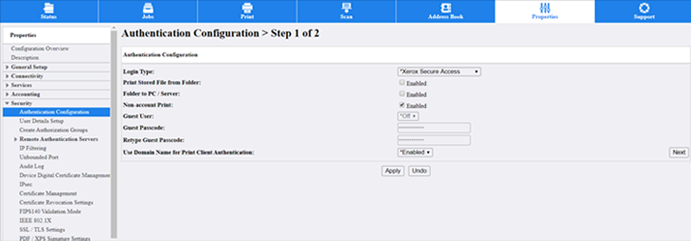
Select Xerox Secure Access as a Login
Type and click Apply. This device
requires multiple reboots during configuration.
-
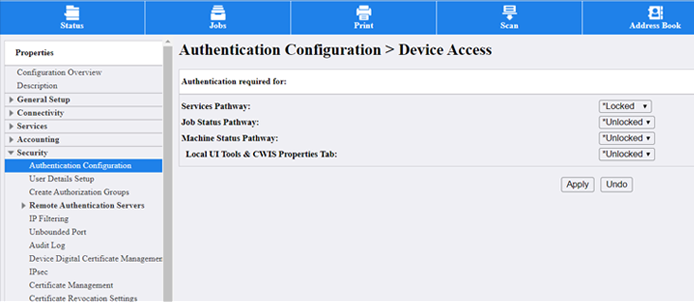
Under Access Control, use Device
Access and Service Access to either lock
entire pathways or lock individual services. To lock all services, click
Configure next to Service
Access and set Services Pathway to
Locked.
For more details on these features, refer to the Xerox PrimeLink System Administrator documentation.
-
Click . Select Enabled next to . If you want to allow the user to log in by typing their user
credentials, select Enable next to Local
Login.
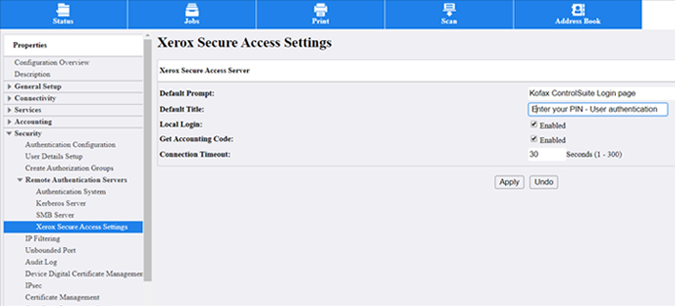
-
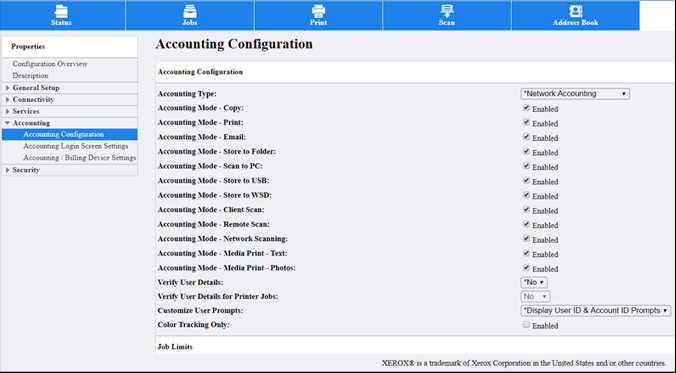
Click .
- Set Accounting Type to Network Accounting.
- Select the type of jobs you want to track and report on.
- Select Display User ID & Account ID Prompts for Customize User Prompts.
- Select No for Verify User Details.