Quick Setup Process for AutoStore
Follow these steps to perform an installation of Samsung Smart UX for an AutoStore only environment:
Note: All steps outlined are performed from the server where the
installation takes place. Administrative access to the server is required.
-
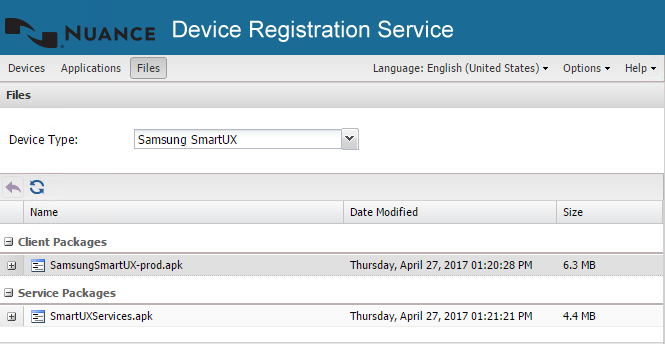
Upload the Samsung Smart UX client and server package files to DRS:
-
Open a web browser and enter http://DRSServerIP:9000/device where
DRSServerIP is the IP address of the server where you installed DRS. The
Kofax Device Registration Service screen
opens:
-
Open a web browser and enter http://DRSServerIP:9000/device where
DRSServerIP is the IP address of the server where you installed DRS. The
Kofax Device Registration Service screen
opens:
-
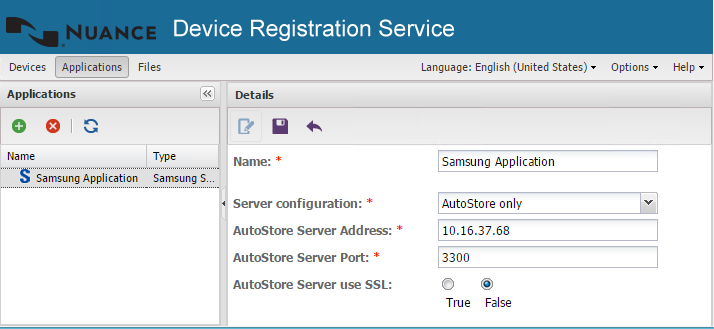
Create the application in DRS:
-
Select the Applications tab.
-
Click the green (
 ) button at the top of the left
Applications pane. The Add
Application function loads into the right pane.
) button at the top of the left
Applications pane. The Add
Application function loads into the right pane.
-
Click the Save button (
 ) at the top
of the Add Application screen.
) at the top
of the Add Application screen.
-
Select the Applications tab.
-
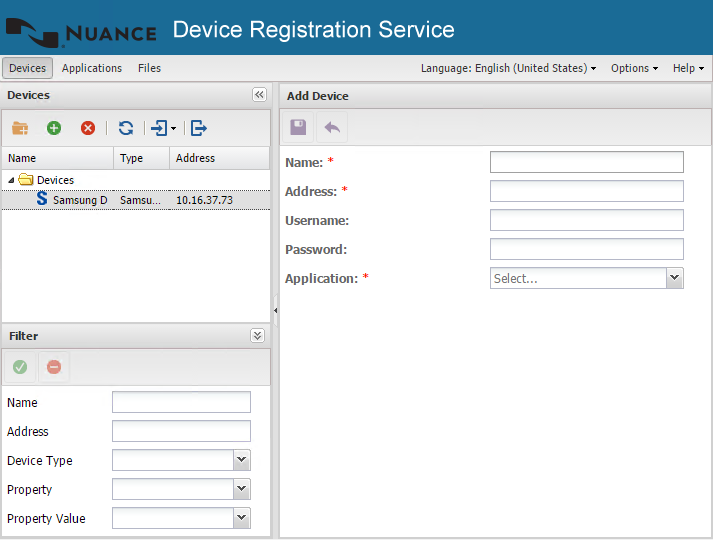
Add a device in DRS:
-
Select the Devices tab.
-
Click the green () button at the top of the left Devices pane.
The
Add Devicefunction loads into the right pane. -
Click the Save () button at
the top of the Add Device pane.
-
Select the Devices tab.
-
Execute final actions. Once you save the Device, a new Select
Action... drop-down list displays at the top of the Devices
pane. The following actions are available:
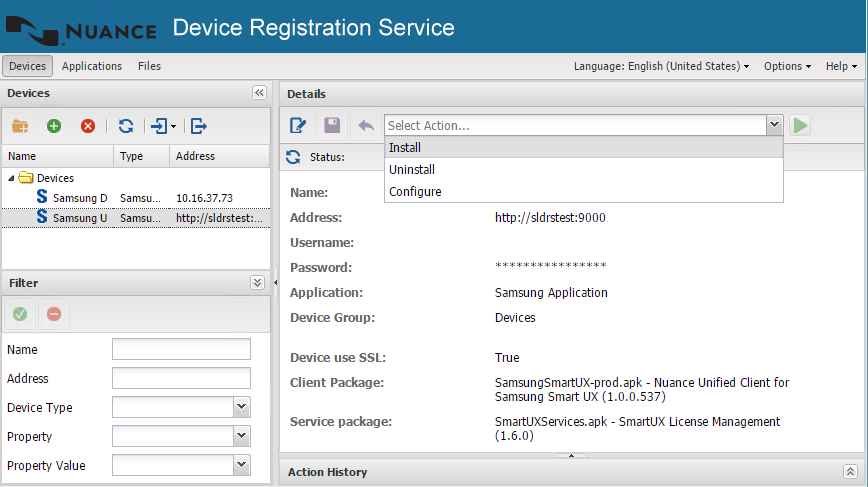
- To install, select Install and click the
Run Action icon (
 ) to
run the action. This may take a few moments to complete; once
finished, a Successfully completed message
appears in the Action History pane at the
bottom of the screen.
) to
run the action. This may take a few moments to complete; once
finished, a Successfully completed message
appears in the Action History pane at the
bottom of the screen. - To uninstall, select Uninstall and click the
Run Action icon () to
run the action. This may take a few moments to complete; once
finished, a Successfully completed message
appears in the Action History pane at the
bottom of the screen.
- To configure, select Configure and click the
Run Action icon () to
run the action. This may take a few moments to complete; once
finished, a Successfully completed message
appears in the Action History pane at the
bottom of the screen.
- To install, select Install and click the
Run Action icon (