Quick Setup Process for AutoStore and Equitrac
Follow these steps to perform an installation of Samsung Smart UX for AutoStore and Equitrac environment:
Note: All steps outlined are performed from the server where the
installation takes place. Administrative access to the server is required.
Note: Although you can deploy DRS to any server as long as there is no port
conflict, a best practice is to install the DRS wherever the Equitrac is
installed. In this way, the DRS server can control the same MFP devices that are
controlled by the corresponding Equitrac server.
-
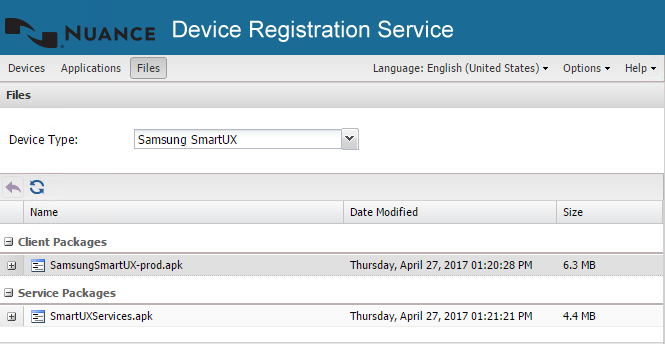
Upload the Samsung Smart UX client and server package files to DRS:
-
Open a web browser and enter http://DRSServerIP:9000/device where
DRSServerIP is the IP address of the server where you installed DRS. The
Kofax Device Registration Service screen
opens:
-
Open a web browser and enter http://DRSServerIP:9000/device where
DRSServerIP is the IP address of the server where you installed DRS. The
Kofax Device Registration Service screen
opens:
-
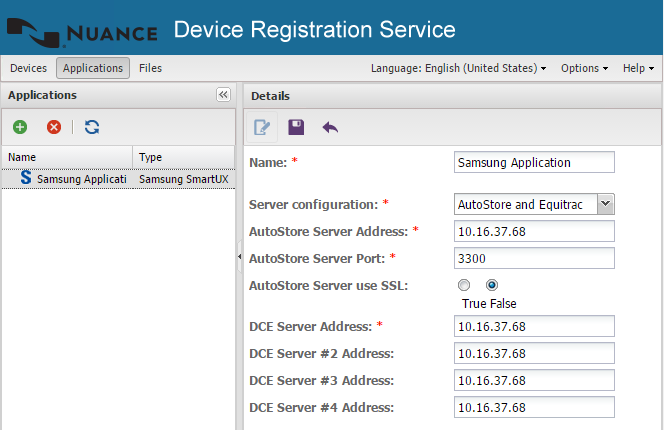
Create the application in DRS:
-
Select the Applications tab.
-
Click the green (
 ) button at the top of the left
Applications pane. The Add
Application function loads into the right pane.
) button at the top of the left
Applications pane. The Add
Application function loads into the right pane.
-
Click the Save button (
 ) at the top of the Add
Application screen.
) at the top of the Add
Application screen.
-
Select the Applications tab.
-
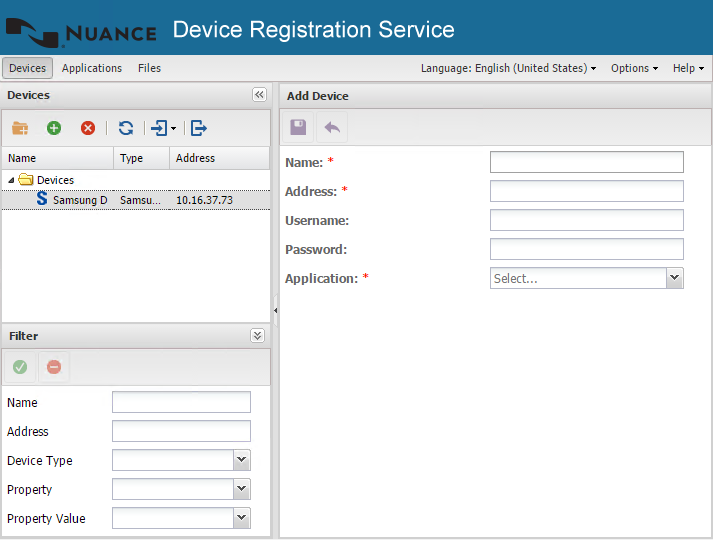
Add a device in DRS:
-
Select the Devices tab.
-
Click the green () button at the top of the left Devices pane.
The
Add Devicefunction loads into the right pane. -
Click the Save () button at
the top of the Add Device pane.
-
Select the Devices tab.
-
Execute final actions. Once you save the Device, a new Select
Action... drop-down list displays at the top of the Devices
pane. The following actions are available:
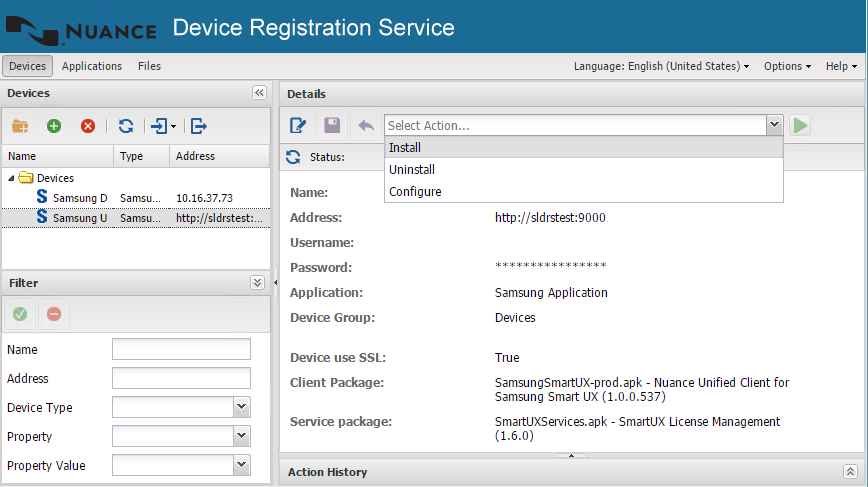
- To install, select Install and click the
Run Action icon (
 ) to
run the action. This may take a few moments to complete; once
finished, a Successfully completed message
appears in the Action History pane at the
bottom of the screen.
) to
run the action. This may take a few moments to complete; once
finished, a Successfully completed message
appears in the Action History pane at the
bottom of the screen. - To uninstall, select Uninstall and click the
Run Action icon () to
run the action. This may take a few moments to complete; once
finished, a Successfully completed message
appears in the Action History pane at the
bottom of the screen.
- To configure, select Configure and click the
Run Action icon () to
run the action. This may take a few moments to complete; once
finished, a Successfully completed message
appears in the Action History pane at the
bottom of the screen.
- To install, select Install and click the
Run Action icon (