Prepare to scan
Log in to the Unified Client for Ricoh SOP at the device with your credentials. Place the document you want to scan into the Automatic Document Feeder (ADF) or, onto the glass of the scanner.
Note: You can place your document at the start of the workflow, or at any
time prior to scanning.
Select a Scan workflow from the available options. Scan workflows are typically set up in System Manager to simplify and automate the Scan process. The following is an example Scan-To-Me screen.
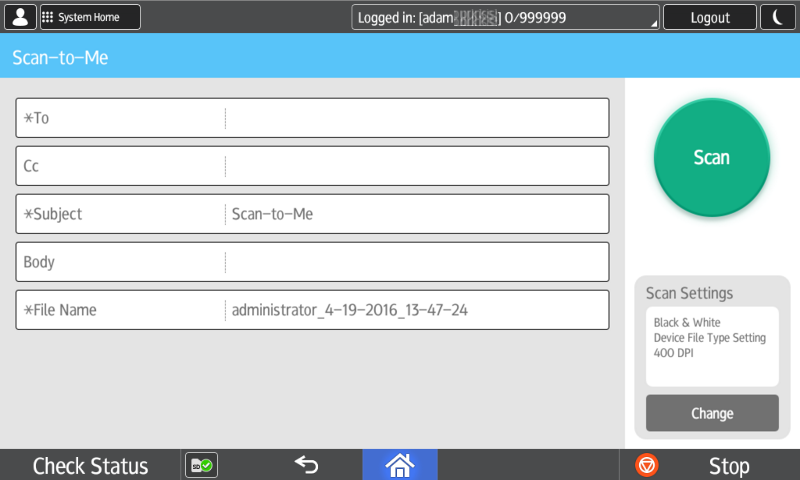
Note: If Capture and Send is not licensed and configured, then only
Scan-To-Me functions are available.
Note: The Scan Processing Engine (SPE) component of Equitrac must be
installed to enable any scan functionality.
Depending upon the destination of your scan, you may be asked to provide specific meta
data. These Job Details are associated with the Scan Job in question. This information
determines specific attributes used in the routing and type of scan produced. Depending
upon how each Scan workflow is configured on the server, some Job Details are collected
automatically based upon your login information. Information that is collected
automatically may be changeable. For example, your email address may be filled in
automatically when sending a scan as a mail destination in the From
attribute. However, if the configuration allows it, you can change this to a different
address. In some cases, these attributes are configured to be static, in which case you
cannot override them, and they may not appear altogether. For this reason, the changeable
fields presented to you at the device may differ from Scan Task to Scan Task, and even from
user to user, depending upon configuration. A list of metadata by workflow type
includes:
- Scan-To-Me or Scan to Email
- To: The email address to route the completed scan. For this workflow, the To field typically auto-populated with the email address associated to the logged-in user.
- Cc: The email address of any other recipient to whom the user wants to send the scan.
- Subject: The subject of the email when delivered. Typically, this defaults to Scan-To-Me.
- Body: Any text the user wants to include in the body of the email message containing the resulting scan.
- File Name: The desired name of the scanned file. This typically auto-populates with system information.
- Scan To Network Folder
- Network Folder: The fully qualified UNC path to the network scan folder. The resulting scan is deposited into this location on the network.
- File Name: The desired name of the scanned file. This typically auto-populates with system information.
- Delivery Format: The desired format for the finished scan. Typically, scans are delivered in PDF format, but this selection field allows a user to select whatever formats are offered through the device setup. Press the field and select the desired option. Note that this list can often be scrolled to display more options than those which fit on screen. See Delivery formats for more information.
Note: If a field is static, you will not be able to change the information. These fields
appear for your information only.
Note: If a field has an asterisk (*) next to it, the field is required, and you must
provide valid information for the field if not prepopulated.
Note: One you have entered metadata and started the scan workflow, you must restart a new
workflow to enter different metadata. If you want to reuse the existing data, you can
simply start a new scan job and the fields prepopulate with the last-used
metadata.
Important: If you want to change the Scan settings, such as paper size, dpi, or
brightness, press the Change button. This opens a new dialog box.
The options for Scan Settings are governed by the abilities of the MFP hosting the
solution. Make the changes you want, then save and you will be returned to the scan
workflow.
Important: If you want to change the Scan settings, such as
paper size, dpi, or brightness, press the Change button. This
opens a new dialog box. The options for Scan Settings are governed by the abilities of
the MFP hosting the solution. Depending upon licensing and your configuration, full scan
integration with AutoStore is supported. Make the changes you want, then save and you
will be returned to the scan workflow.