Database Import
Database connection options
- Database Type: Select the database type from the list.
- Database: Manually build a connection string or use the Select button to open the Database Connection Setup dialog box and browse to an available database, which then automatically builds a connection string based on your input and selections.
- Table or view: Select the table or view applicable to this database import.
Import definition
-
Form ID: The name of the form. The form ID is required and must be unique.
Some fields have a Build button. Clicking it opens the appropriate Classification Form Configuration dialog box, where you can add values from different database fields or constants.
-
Description: Write a description, which can be based on an index field.
-
Tag: Setup a tag, which can also be mapped to an index field.
-
Record type: Select a record type:
-
No record type
-
Select from existing
-
Map to database column
-
Enter manually
-
-
Group: Select a group:
-
No group
-
Select from existing
-
Map to database column
-
Enter manually
-
-
Page count: Map this value to a database column or enter it manually.
Classification rules and import options
Classification rules and import options are optional to configure. Setting up rules during this step applies them universally across all imported forms. Because rules are optional, you can come back later and add rules to individual forms.
When defining rules, you can either use the values from the table or run the values through the Regex builder to generate codes. This behavior is controlled for each rule separately with the Convert to Regex check box. Click the gear icon on the toolbar to view or modify the global settings for Regular Expression Builder Options.
If Convert to Regex is selected for a rule, you can specify the Regex Format:
-
Standard: Uses the global Regular Expression Builder Options to generate the regular expression.
-
Numeric - Format independent: Generates a regular expression that matches any text that contains the numeric digits of the value being used to generate the regular expression, no matter what extra characters are also in the text.
Rule Match Behavior: This setting uses the value of the Match column. See Table 2 for more information. When rules are created during import, they are generated with the Match type defined on the rule definition on the import template.
The Import Options tab has the following settings:
-
Duplicate Form ID behavior: If a duplicate is found (the form already exists), users can either skip creating the duplicate form or add the rules to an existing form.
-
Mark imported Classification Forms...: If selected, this option imports the form as not validated. If the Validated check box in Classification Forms is selected, documents that match these non-validated forms are treated as exceptions to be processed on the Classification Validation dialog box. To validate the form, the user must open the form in the ACE dialog box. When the user saves out of ACE, the form becomes validated for that document, any other documents in the batch of the same form type, and all future documents classified as that form type.
-
Do not create Classification Forms that have no rules: If selected, no rule is added and the form is not created. The system warns the user and lets them know which form definitions were not made.
Scheduling recurring database imports
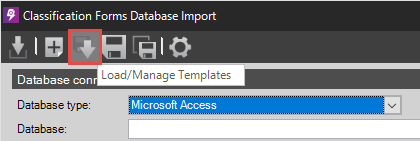
Once a database connection has been configured, click the
Save Template
 icon and then the
Load/Manage Templates icon on the toolbar to open the
Load/Manage Classification Database Import Templates dialog box.
icon and then the
Load/Manage Templates icon on the toolbar to open the
Load/Manage Classification Database Import Templates dialog box.
Select the calendar icon next to the profile that you wish to schedule for a recurring import. The Scheduled Import dialog box appears.
-
Enable recurring automated import: Select this box to enable a regularly scheduled database import.
-
Import destination: Specify whether you wish to import the classification profile to the list of global classification forms, or restrict it to a specific capture profile.
If you select Capture Profile, pick the corresponding capture profile after clicking Select Capture Profile.
-
Recurrence Settings: Setup the recurrence of the database import in the appearing dialog box.
Customize the interval and the time of day to perform the import according to your business needs.